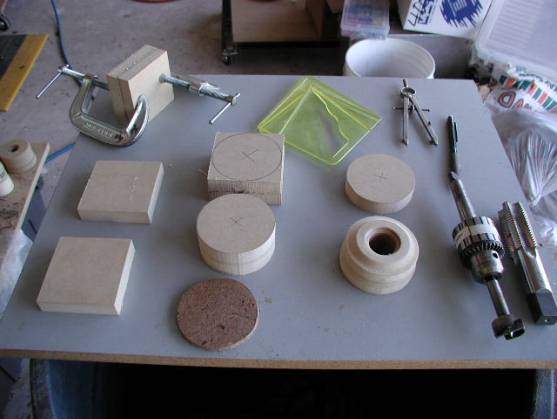
 These are the steps I go through to make the MDF type chucks. Cut 3 each 3 1/4″ squares as bottom left. Next glue 2 together and clamp. Let dry. Then mark with a center finder a circle on the 2 glued pieces and the 3 rd disk. Also mark a 1/4″ disk 3″ and cut round on the band saw. Tools that I use are shown. Drill chuck and tap the size for your lathes headstock, clamps, center finder, compass, and pencil. One completed MDF chuck is shown. So lets go through the steps to make the MDF chucks.
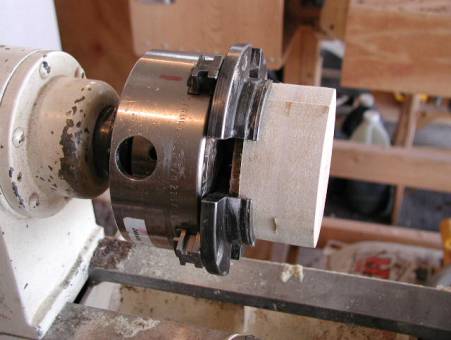 Here the 1/4″ disk in behind the 2 glued MDF disk. The 1/4″ disk spaces the MDF out so the drill bit will NOT hit the chuck. It also keeps super thin super glue from getting in the chuck jaws when gluing.
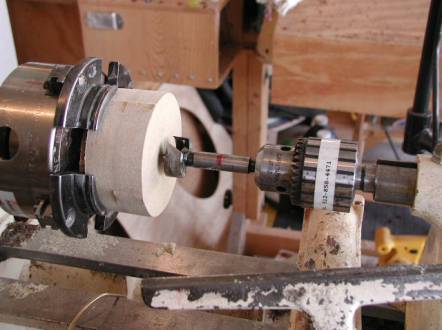 This picture shows the forstner bit marked for the depth of the 2 MDF disk. Note the red line on the bit. Drill to the premarked depth, the length of the spindle from the front to the back (shown here as a red line)
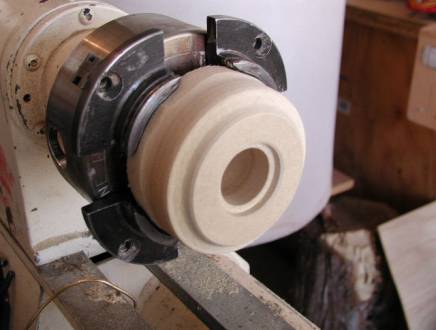 Remove the Forstner bit. Cut the face true and cut a recess as shown. This recess allows the MDF to seat next to the headstock. Also round the corner down as needed for your lathe. Using the super thin super glue, coat the inside of the hole and recess.
Hit with accelerator to cure the glue.
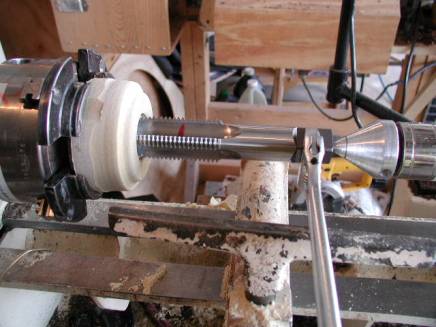 Mark your tap for the depth of the 2 MDF disks. Note the red mark on the tap. Place the tap between the live center and MDF chuck. Place a crescent wrench on the tap and lay the wrench on the tool rest.
Here is the fun part. With the right hand, advance the tail stock hand wheel while turning the headstock with the left hand. This will keep the tap running true into the MDF. When the tap is bottomed to the red line, loosen the tailstock lock but do NOT remove it . Now hold the wrench and back the tap out of the MDF. This method keeps the tap true with the MDF. Next coat the threads inside with thin super glue and hit with the accelerator. When the glue is set, repeat the taping procedure. Next with the tap still in to the red mark, loosen the chuck while holding the tap in the right hand. Use the crescent wrench and turn the tap complete through the 2 MDF disk. It is best to set the disk aside for a couple days, as the MDF will swell some from the super glue. After a couple days run the tap back through the disk. Now, screw the disk onto the lathe headstock and true up the face. (ED) Now is when you want to cut out a section, like the inside of a bowl, leaving a 1/4″ to 1/2″ thick lip at the top). The next step is to glue on the single disk. This is accomplished by putting glue on the disk. Place on the tailstock and clamp next to the other 2 disks. Let set to dry. When dry, true up the face. If to be used for a vacuum drum chuck, drill a hole through the disk and glue on how many other disks to suit your needs. (ED) Personally, at this stage I would (using a respirator and a well ventilated area) would flood the MDF with a 50/50 lacquer thinner/precat lacquer and allow to dry, then do it again, dry, then again. This seals the pours of the MDF minimizing air leakage when using it as a vacuum chuck)
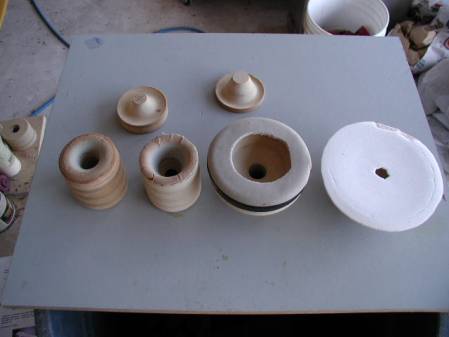
Here are some examples of vacuum drum chucks. Make the drum chuck to suit your needs. Self-adhesive close cell foam is used as the sealing means on the drum chucks. The 2 cone shaped items are formers for the 2 drum chucks on the left. This is not needed but when not in use keeps the foam shaped better than without the former. Your call.
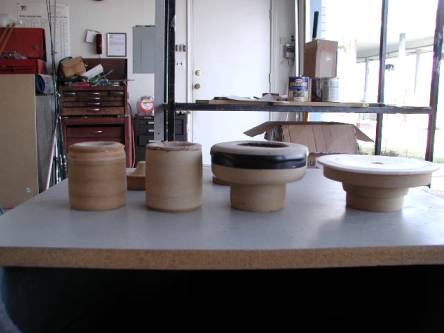 This is a side view of the same drum chucks. Black electrical tape may be used to hole the close cell foam down on the side if needed.
(ED) Look at gaffers tape, doesn’t leave a residue and is as strong as Duct Tape
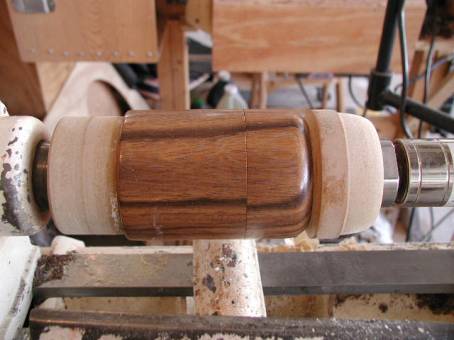
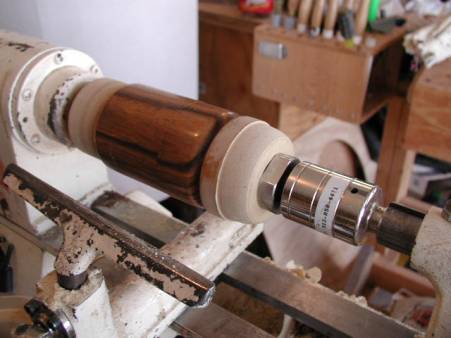 The 1st photo shows the MDF chucks being used to make a lidded box
The next shows the tail stock adapter in the MDF type chuck, which holds the lid of the box.
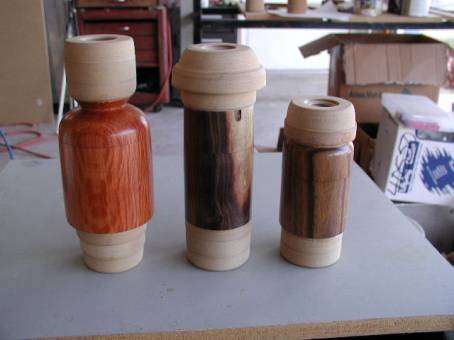
Here are 3 different lidded boxes.
Left is California Red Wood, center is Texas Ebony,
right is an unknown wood I picked up some place.
All these boxes are now ready to finish using the vacuum system.
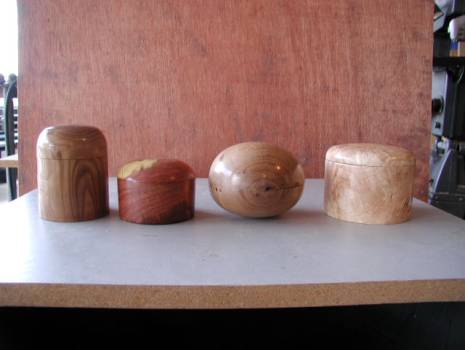
Here a few finished lidded boxes. Left is Russian olive wood I received from Ken Anderson.
Next is Texas Mesquite.
Then a round box of Butternut and the one on the right is of Texas Ash. All were completed using a vacuum chucking system.
This was written by Johnny Tolly some years ago and dug up from the old website and redone . Still very pertinent today